


"ABCDEFI"
Anthony Fury's 1968 Fury III
The tear-jerking saga of a 25-year-old boy and a Quad Turbo Plymouth Fury: NOW it can be told!
9/1/06:
For anyone who has been under a rock (or doesn't hang out at Turbomustangs.com), my car has made some pretty decent progress in the last year. But, just how
much could a college hack with no carburetor tuning skills get done to a chunk of shit such as my car? Well, from my last update, I'd just sold my 440 block, injectors, intake, and
pistons to pay for school. Originally, when I got the bright idea to turbocharge this pile (around 2001), the plan was to have everything set up for an RB block so I could switch to a Megablock later and still use
all my components. The theory being: I would eventually make more than the magic "600HP explosion" mark with my 440 (a mark which, to this day, Mopar
sheep continue to "BAA-AAA" out every time you say you're planning something more wicked than home-ported 906s and a purple cam.....goddamn bozos).
Keep in mind this plan was hatched 1. when Megablocks were still offered, 2. when I had no idea that better heads would raise the ports *anyway* and thus
negate much of my swapability plans, 3. when I thought rod ratio always trumped reciprocating mass, 4. when B-deck Megablocks didn't exist, and the only
available B-superblock options were cast in pure platinum with NASA-spec titanium caps (at least the price reflected this - I might be wrong) and 5. long before I'd graduated
TRENDZ University.
Today, Megablocks have been discontinued, the highly vaunted "middle of the road" iron B-block has debuted at $3000 without machining, because hey,
Mopar guys love getting raked over the coals, and I have a new belief system - one that hinges primarily on the efforts of the same guy that made it into
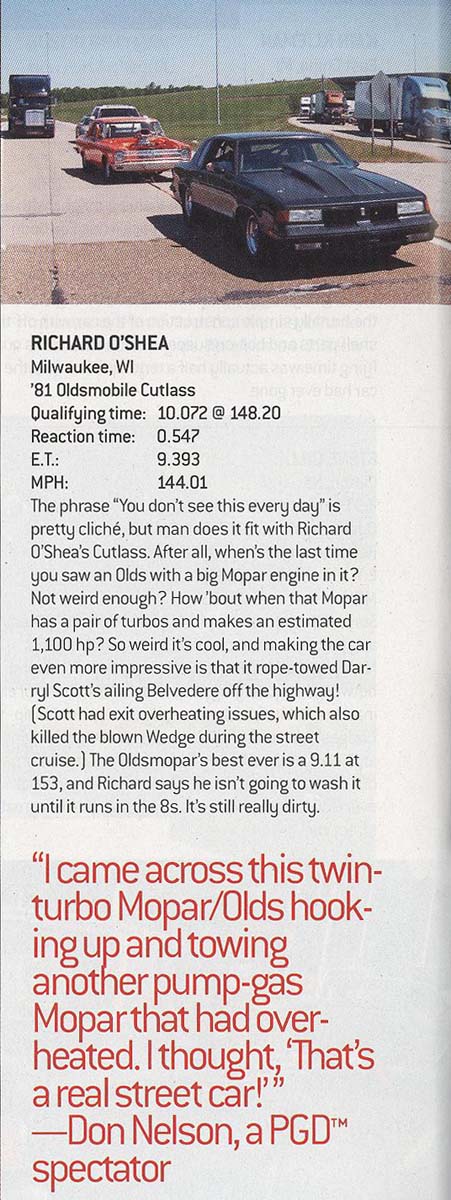
the 2006 Pump Gas drags with a 9-flat, 3600lb Olds Cutlass with a TT B-Chrysler motor. When I saw his results and read his tuning philosophy, it became evident
that in order to trash a factory block, I would either need to start making well beyond the tested "kilo-horse," or wind my motor to 8500RPM with 40° of timing
and without a wideband. The latter idea didn't really appeal to me, so I decided it was time to ditch the RB block/accessories altogether, despite
the fact that Shaun and I had already built the first turbo header on a "mocked" RB block, and that I already had an EFI intake done for it (which started
as an X-mas gift from mom....sniff!). My master cylinder was thrilled with the decision.
I had to remove the dead 400 with a ground-up Comp cam from my car to begin, which had kept my car parked for close to 3 years.
Thanks to Bob J., alias Stationwagonguy, I located a guy selling a complete 400....right in my hometown! I still have no idea how he found that out.
He dropped it off for $300, and I.....did absolutely nothing to it! Actually, I cleaned it off, changed the oil pan and painted it. I didn't even
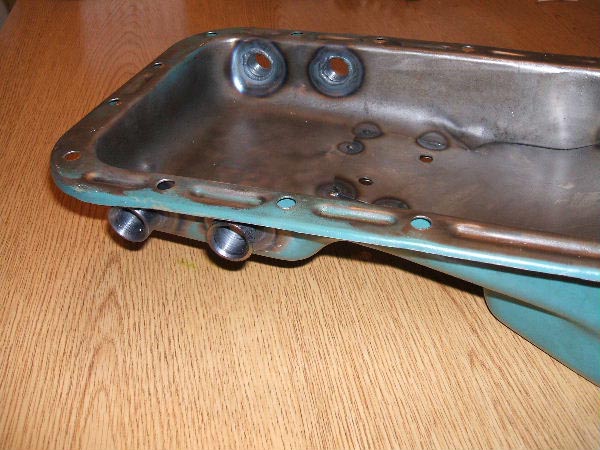
change the oil pump, timing chain, or intermediate shaft (as I've done with all my junkyard motors). Before I bolted on my turbo-ready C-body oil pan, though, I had to tap the
dipstick hole to accept my "modified" Milodon dipstick. Turns out the guy I bought it from wrecked the crap out of the end that slides into the block
(and failed to mention this at the point of sale....what did I want for $10?),
so I cut it off, bored and counter-bored a 7/16-20 cap screw, and had Shaun-O weld it to the dipstick. I did my other block while I had the tap checked out
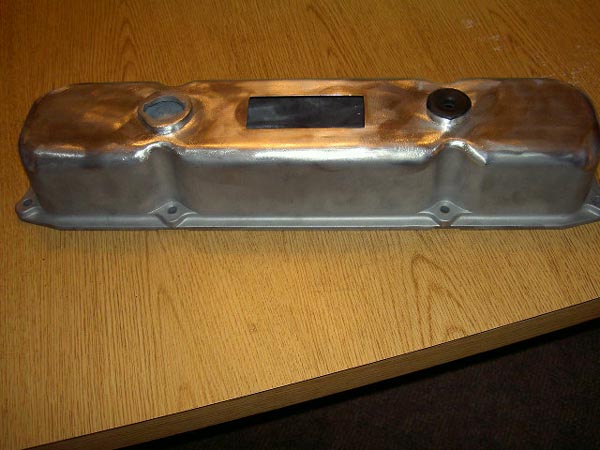
from the library. I also got my act together on another goofy dream of mine - stock looking valvecovers with more clearance and without the leaks. A pair
of cast / finned Weiand valvecovers were scored on the 'Bay for $75, and I went to work milling the piss out of the fins (this made a lot of noise).
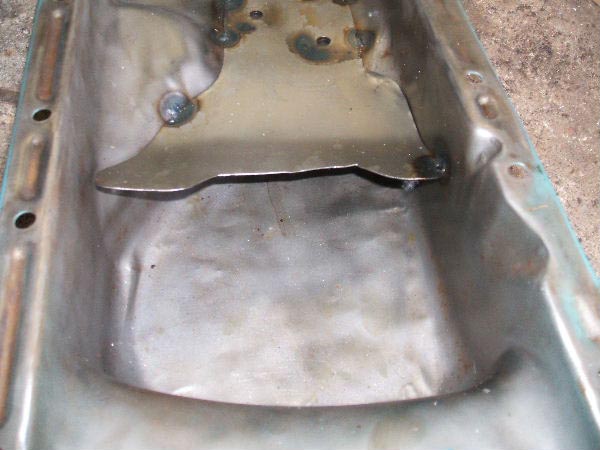
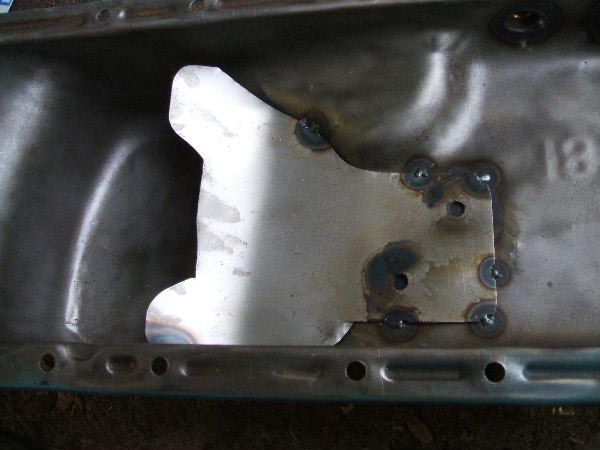
Milling the center "pad" out left a big gaping hole, which Shaun also graciously welded. Shaun ALSO welded 4x 1/2" NPT bungs (which I'd machined from ordinary hardware store unions) and tacked the baffle to my oil pan, which I
leak-tested and painted.


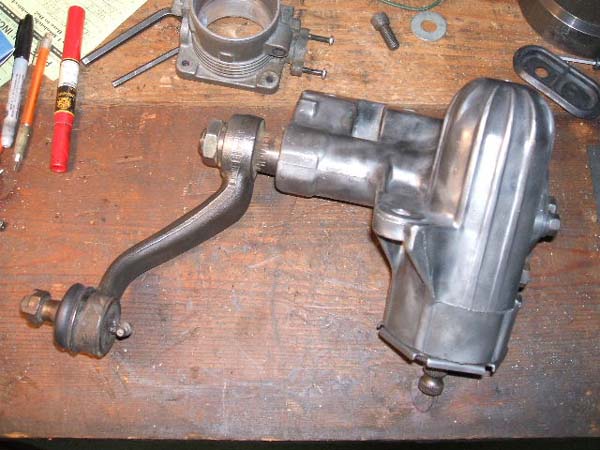
Another thing I wanted to do was convert to manual steering. My old pump and box were both getting leaky, and
I thought manual brakes and power steering would be sort of goofy. Plus, the amount of weight you shave off the front
end is significant, not to mention the freed up horsepower (like it will matter with turbos, but you get the idea). I picked
up a no-slop steering box for $75 and cleaned it up, and I also rebuilt and cleaned up the stock coupler
and had Shaun weld some zerk fittings to it (for greasibility). I ordered the "power-to-manual" steering coupler adapter, which
"works with all Mopars, no matter what!" When I put it on, either splined end engaged less than 1/4". By my estimations, this thing
was short by an entire inch. What made me mad is when I called to explain this, they just said "you're the first person to have
a problem with this. No, we're not interested in your application or trying to diagnose your problem in case this issue ever presents itself again,
because our stuff always works and you're probably just an idiot!"
Of course they didn't call me an idiot directly, but what a bunch of arch-jagoffs. I was bummed, because I couldn't drop the motor in until this was resolved.
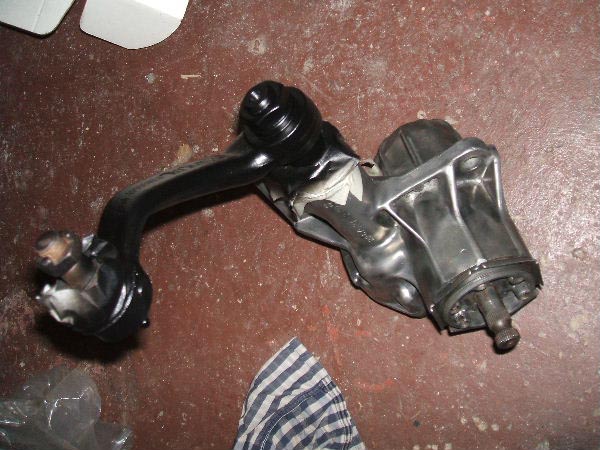
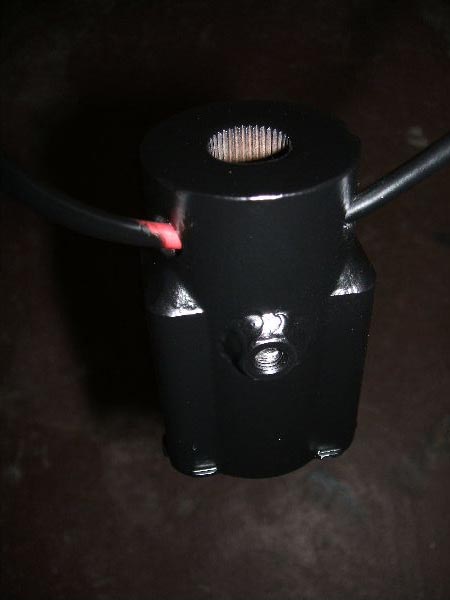
Anyway, after I returned it, I did some homework, and with the help of a brutalized
power steering box and a commonly available coupler, I made my own for 1/12th of their ridiculous price. I used a hellacious press fit, and
then had Shaun fillet weld the joint. This thing is not moving for anybody. In the process, I also found out how to make and sell these things for half of
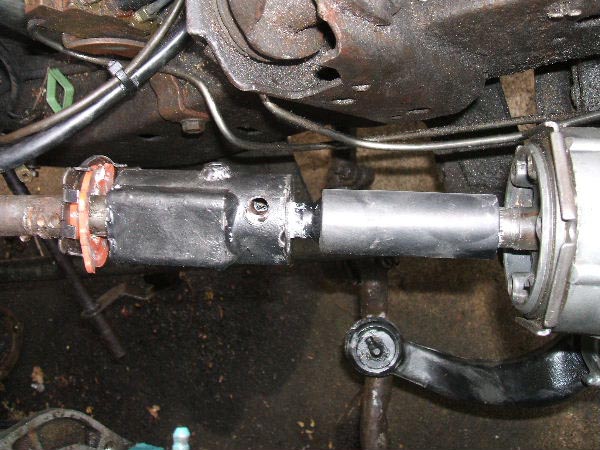
what the dickheads at ******** charge for their poorly welded trash, and still be profitable. Who's the idiot now?! I dropped the motor in as soon as I got the coupler together,
and slathered the piss out of every mating surface with Anti-sieze since I had to Sawzall the old coupler out.
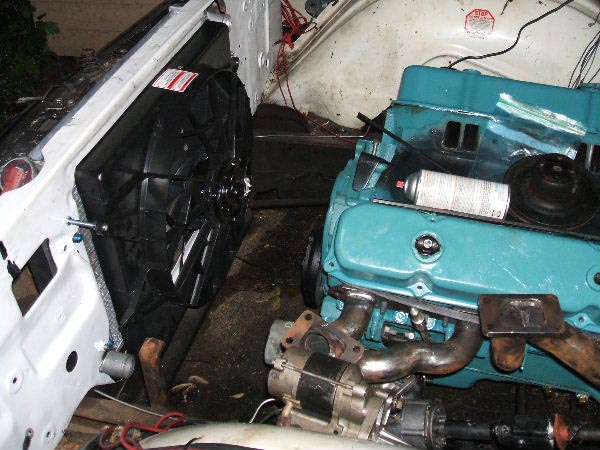
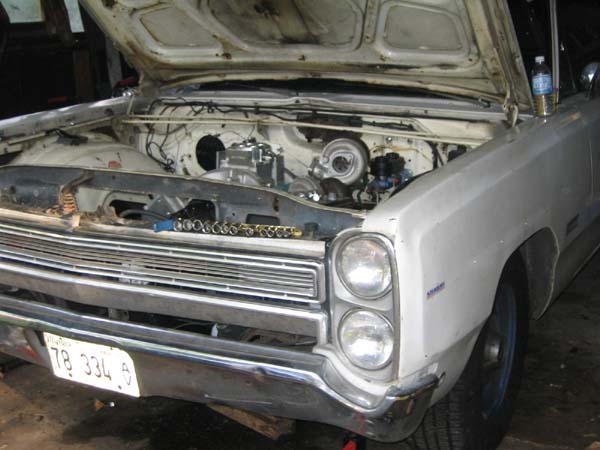
After being stuck on the Kennedy at 5:00 P.M. on the hottest day of the year in my car, I was well aware of the overheating capabilities of a Chrysler big block.
This was with plain iron heads, no overbore (unless you count the "natural" overbore of an ~85,000 mile motor), and headers. How was this cooling
system going to stand up to a fresh, aluminum headed motor (which dumps way more heat into the coolant) with a bunch of hot turbos hanging off of it? One
thing was certain - I knew I had to have *at least one* Lincoln Mark VIII fan after seeing it in action on Shaun's car. It comes stock with OEM reliability and
longevity, as well as 4000CFM air-moving ability! Try that with your stupid, overpriced Flex-a-lite fans! The downside is that it sucks a ton of power, which
would further tax the car's already-frightening electrical situation (more on that later). Another downside is: it wouldn't fit at all, even with the shroud
COMPLETELY trimmed away. I was not about to turn my back on this thing, so after some measuring and thinking, I determined that a properly-sized
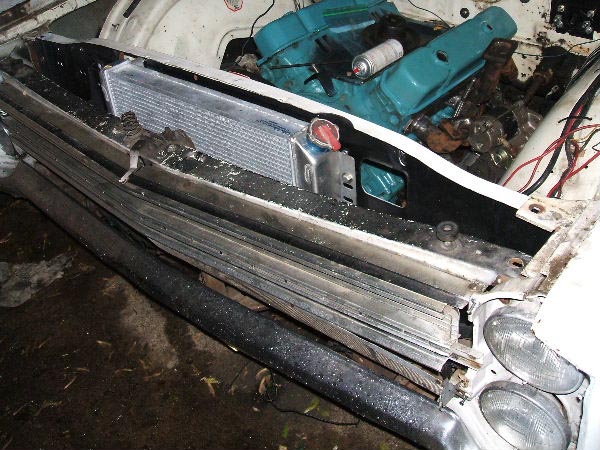
aftermarket radiator would fit AFT of the radiator support with a little modification. Unfortunately for my wallet, the stock BB radiator
was just too tall to clear the subframe's yoke in the desired "aft" position. I hemmed and hawed about this until I saw a Summit radiator sale. 26" x 19",
side flow aluminum radiator, with a Driver's side inlet and pass. side exit AND a trans cooler: $260 shipped to my door. After I taped 3 or 4 layers of cardboard to each side of the fins, I went to
work with a sawzall and a tape measure. (My new motto after this step became: "It's a great day when you get to take a sawzall to a car."). I wanted to be sure
it would fit right away, in case I had to return it......so I did get a little "sawzall-happy" on the support. Now that I'm sure where the radiator will
sit, I might do a nicer job on another support someday, but this is fine for now. I machined some standoffs for it and carefully cut the radiator's mounting
ears off; Shaun welded in the standoffs and relocated the ears to the "face" of the radiator. I also added a radius for easier cap removal.
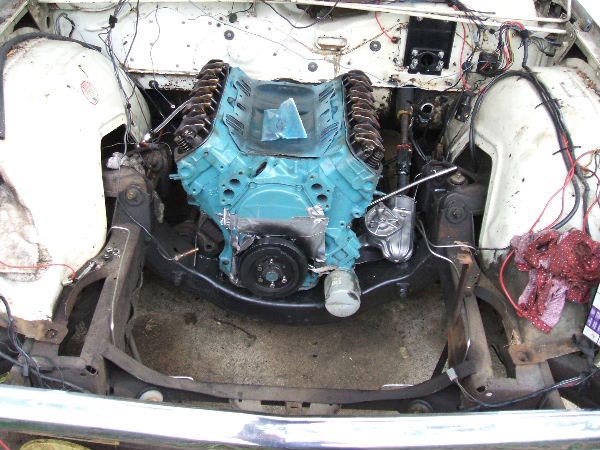
With the radiator completely out of the way, the Ford fan looks like it grew there! And, best of all, I didn't "undo" any of the research and development that Ford spent on designing the shroud by senselessly hacking it
off. Minor clearancing was also necessary for the grille support, but everything else stays in the stock location and allows normal hood latching.
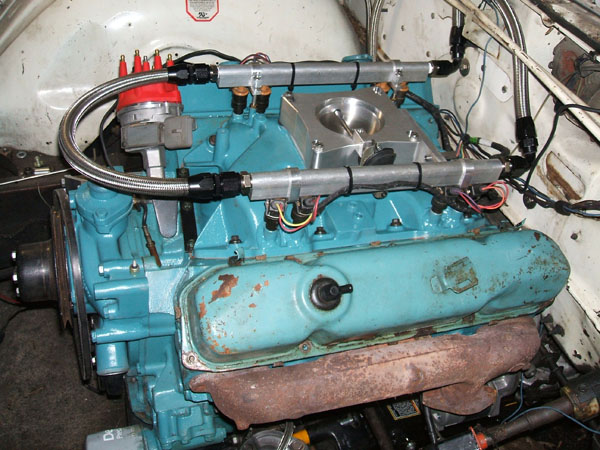
Also, notice the painted "stock" valve covers on the motor in these shots!
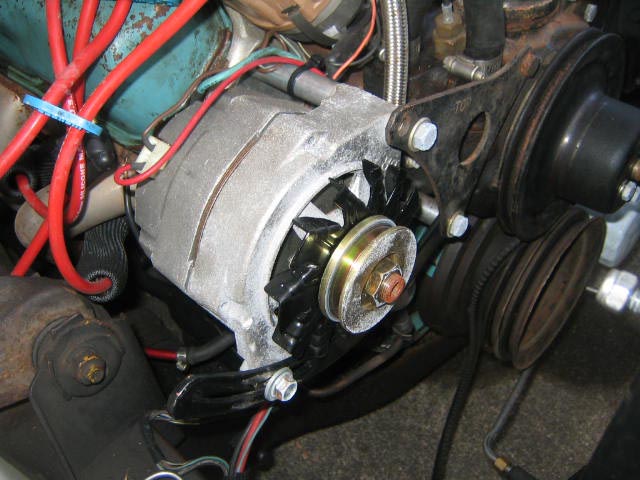
Another improvement came by way of alternator improvement and re-location. I had swapped in a 10SI from a real backyard operation
on eBay. They claimed 135 amps....yeah right - this thing charged worse than my old stock alternator! Anyway, I had originally made up some spacers, as
well as adapting a Chevy "hockey stick" adjuster, which allowed fitment in the stock location. (Pictured, far left) I knew the alternator would eventually
have to be moved downward if my passenger side header was going to perfectly mirror my driver's side. Further re-inforcing this was the fact that the "legit"
120A 12SI I'd purchased from Advance was slightly larger and wouldn't fit at all in the other alternator's spot. If you're wondering, the application
is a 1990 9C1 Chevy Caprice (Police car). I wonder where I got that idea from....but yeah, this thing had way more mass and bulk than the one it replaced.
Best of all, it was $70 after exchanging the other hunk of crap, comes with a lifetime warranty, and is exchangeable across the nation! Can you get a replacement
"MSD" billet alternator when it strands you in the middle of a corn field? Sure, if you have time to order another one from Summit and wait for it to get to you, since
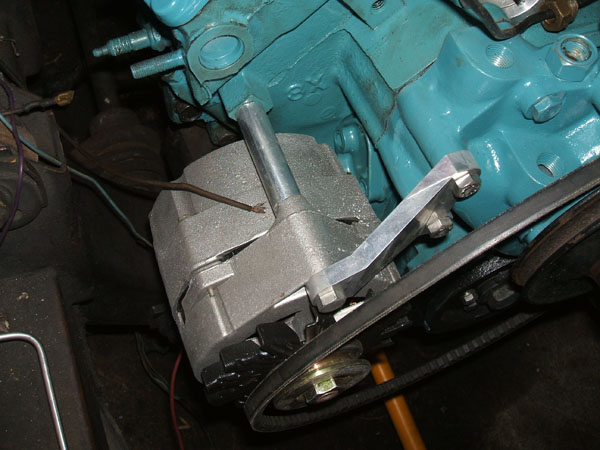
I bet it doesn't have a warranty! Okay, back to the story - I machined this bracket out of 7075 and a couple of extra spacers for the "hockey stick." Fear not,
anti-billet citizen: it will all be painted flat black shortly! I also had to program and machine a bigger bolt arc in the "hockey stick" since the new
alternator's tensioner bolt was much bigger (not pictured). By the way, here's a shout-out to Mark at MAD Electrical: thanks
for the wiring kit, advice, support, and numerous tech articles! Also, hiding beneath the bracket is an aluminum water pump housing and pump, which I re-tapped
to actually ALLOW COMMON FUCKING 3/8" NPT FITTINGS TO SCREW IN PAST THE FIRST THREAD!
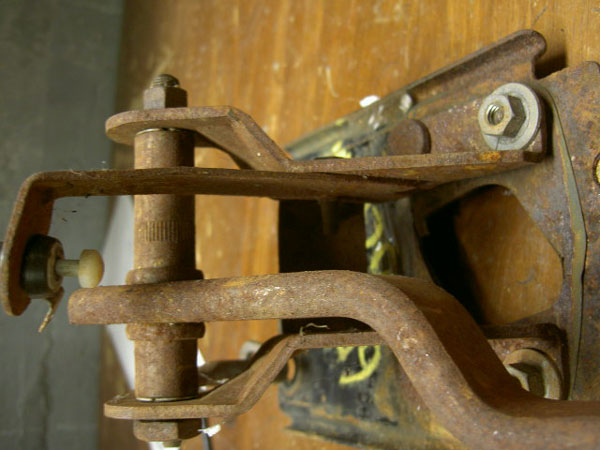
Unlike the manual steering conversion; manual brakes were a necessity. Trying to squeeze 4 turbos under the stock hood without cutting it meant ditching the brake booster. I have a motto,
and it is "DO NOT FUCK AROUND WHEN IT COMES TO BRAKES." I've cringed at most of the relocated booster/master cylinder hacks I've ever seen, and my car was
definitely not going to be one of those hacks! Previously, there'd been heated debate (with no real evidence produced on either side) about whether
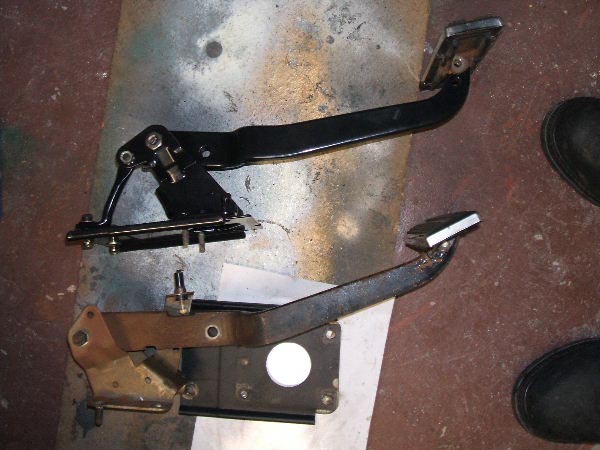
or not manual C-body pedals were any different from power C-body pedals. When my manual pedal came in the mail, it confirmed my theory that the
two were COMPLETELY different. Notice the different pivot points, different mounting points, and longer pedal. It sticks out WAY further when it's installed, too.
One thing nobody tells you about when you buy this master cylinder is: it only works as a manual setup since it requires much more pedal travel than the
power setup allows. I attribute this to being the main reason my car never stopped after I switched this master cylinder in.
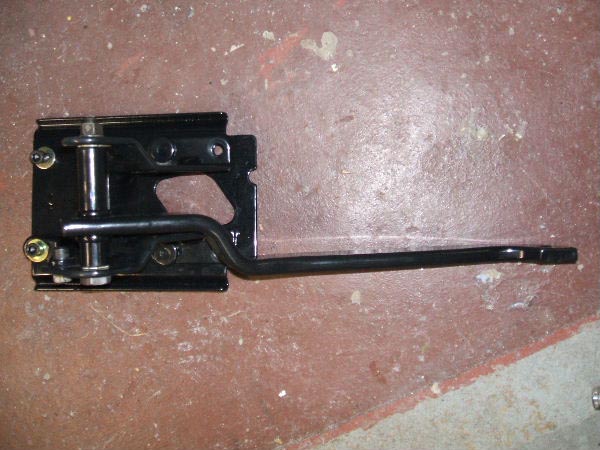
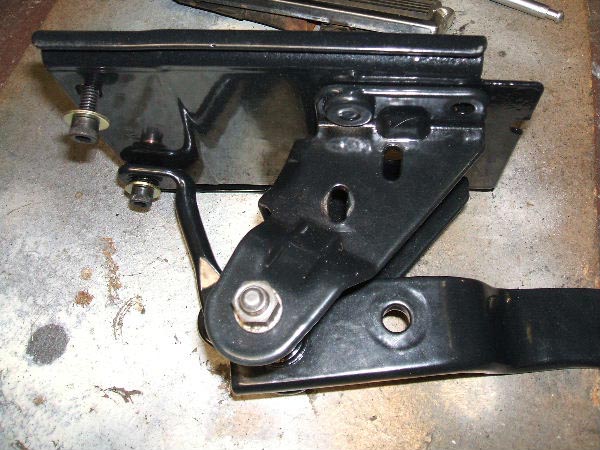
I took it apart, sandblasted everything, and handed it over to Elio at Slipmate for some nice black powdercoat. This should easily
get me a trophy in the "prettiest C-body pedal" competition! It will be pushing on a Mopar Performance aluminum MC and an AREngineering adapter (which I'll
rant about later).


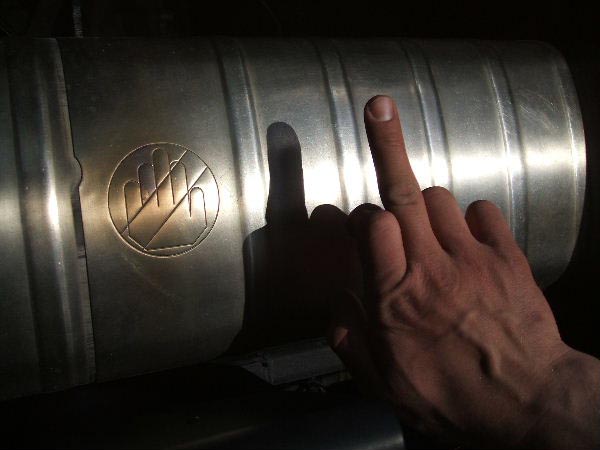
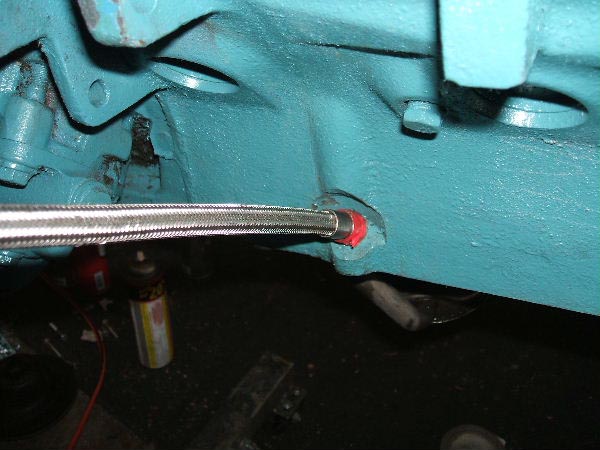
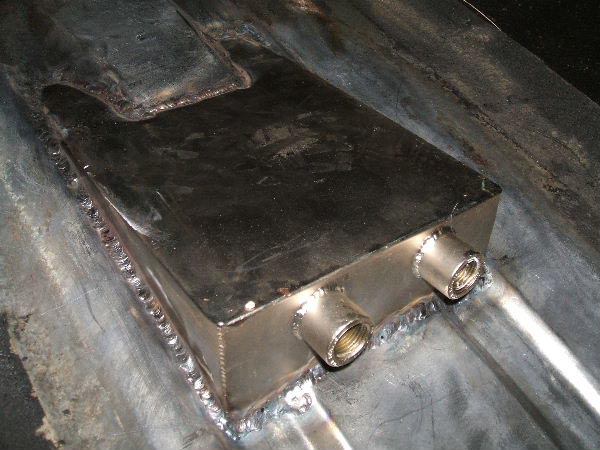
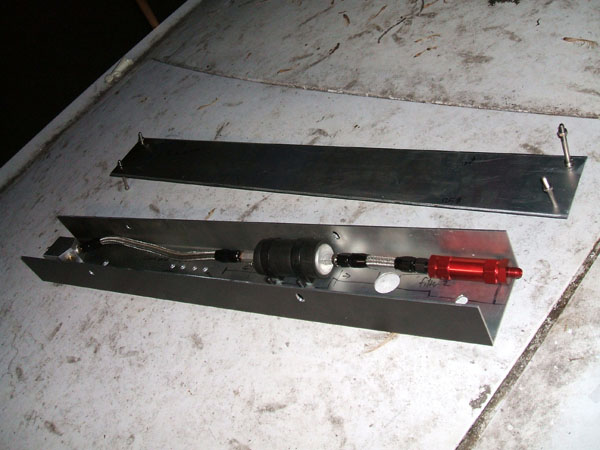
One source of grief was my decision to sump my fuel tank. Like everyone, I wanted my fuel pumps to be fed at all times, ESPECIALLY during hard acceleration.
Although it would have pretty much solved all of my problems at once, I was opposed to a modern fuel cell sitting in the trunk for a bevy of reasons.
First and foremost: EVERYTHING on my car absolutely has to be done the hard way. Second, I would have undoubtedly given up capacity (and thus, cruising range)
for a cell. Third, I would have given up most, if not all of my wonderful trunk space! "Hello McFly, Street Car!" Onward: the stock
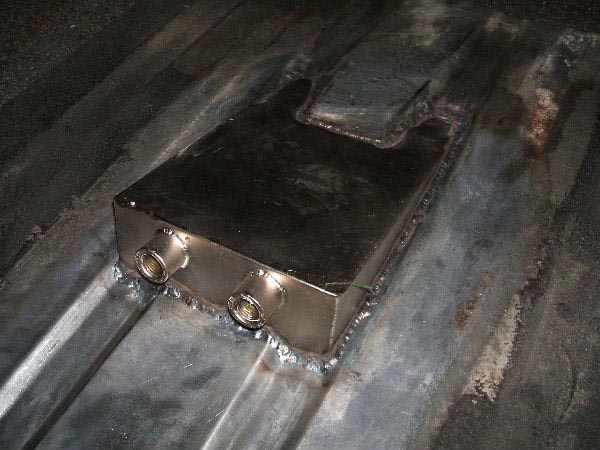
C-body tank is pretty much a big living room, with no internal baffling whatsoever, so rearward slosh would definitely be a problem. I bought a Wild Rides
sump, which was cheaper than the Comp sump, and seemed pretty neat with a big ol' pair of 1/2" NPT bungs sticking straight out. After some more thinking and measuring,
I chopped a big rectangle in the factory tank with a cutoff wheel.
The factory creases made it a real challenge to nail the angle....despite a slow hand and many measurements, it was still off a bit,
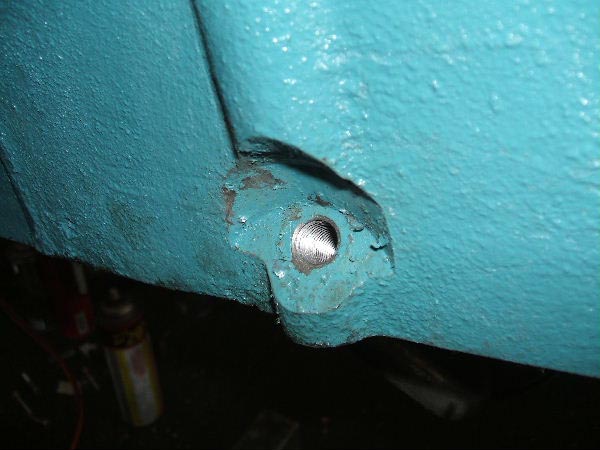
so I had to do some "bodywork" to reshape it. I made a baffle for it, and Shaun tacked it to the top of the "wedge." It was then electroless-nickel plated.
Shaun then welded the galvanized steel to the plated sump with a stainless rod (and many big gaps left behind in the shaping process). It passed the leak test
on the first try!!! By my estimations, the only place left for corrosion is the weld around the perimeter, which has very little surface area. And, since the
actual welds themselves are not pure steel, this will also hopefully keep the corrosion at bay. Oh yeah - once it passed the leak test,
I bombarded it all with undercoat paint. I don't think this really "gives anything away" on the car,
especially with the "EFI" bit in the license plate - do you, Mr. Mixon or Mr. Milner? If you say yes, I will change out the braided SS steel
for some of that hellaciously expensive black teflon-braid stuff and THEN we'll see who's sneaky! I want cookies.
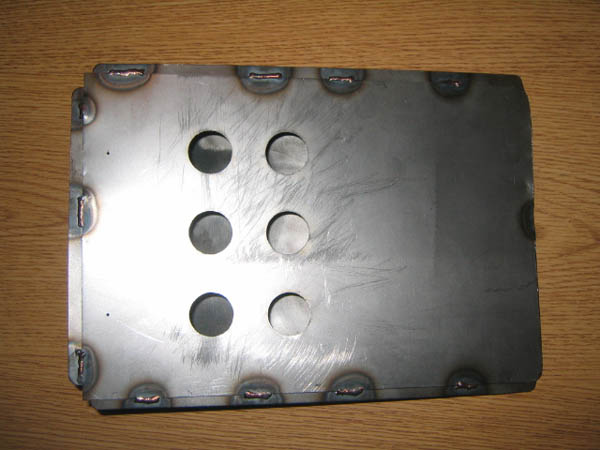


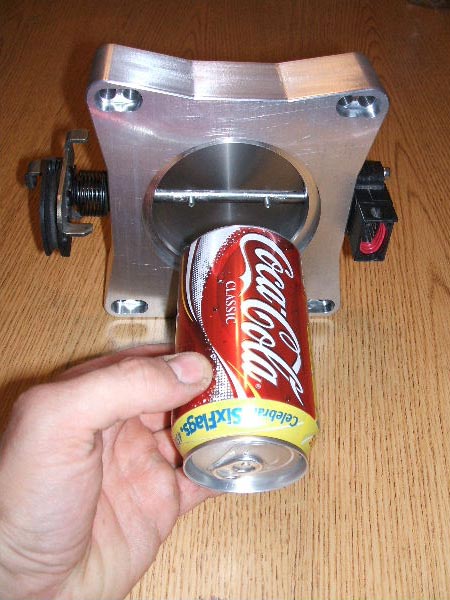
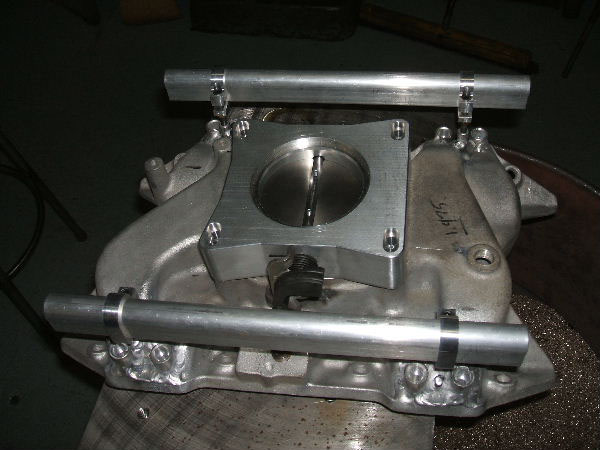
Now, as all of this was being accomplished, I was busy making EFI components at my day job. Components that include a throttle body, manifold, hot-rod rail clamps/holddowns,
fuel pump case, and putting the finishing touches on my TFI distributor and adapter. Since I want to keep the DIY-EFI page alive and relevant,
Visit the DIY EFI page! for more info. Here are the "Cliff Notes" if you're too lazy to click...or
are just afraid to read my mindless and unnecessarily long-winded commentary.

"Where are these turbos I keep talking about? And why 4? Am I some kind of idiot? Do I like pain? I'm going to melt my master cylinder. Did I see that '57 Chevy with 8 turbos? Didn't I see that Mike Moran and John Meaney made a Quad turbo pro-mod motor already? I'm not the first. Don't I know that twins or a big single is all I need, and 4 is just unnecessary? Aren't I just trying to be different? If I wanted to be different, why don't I just put 5 slant-6 motors into one car and run them all on seaweed, as you're doing and will start telling me all about right now? Aren't you, the all-knowing, ever-present car-show-going experts allowed to express your superior knowledge of turbo systems while simultaneously exposing my obvious lack of formal or practical experience through irrefutable facts from "Car and Driver" and the Banks Power website?"
The simple answer to all of these questions is: my car has 4 turbos, and yours do not, bitches. Of course, all of your arguments were considered well before you could even spell "car," smart guys. Let's continue, shall we?
Here are factors that actually influenced my decision -
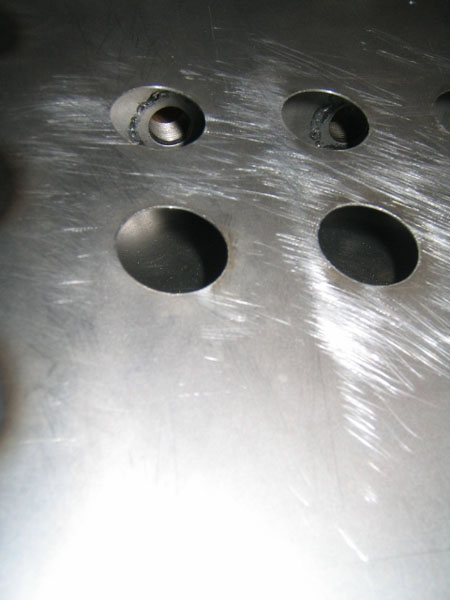
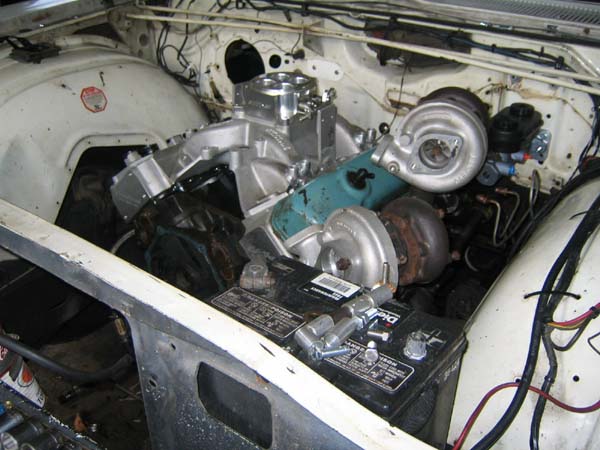
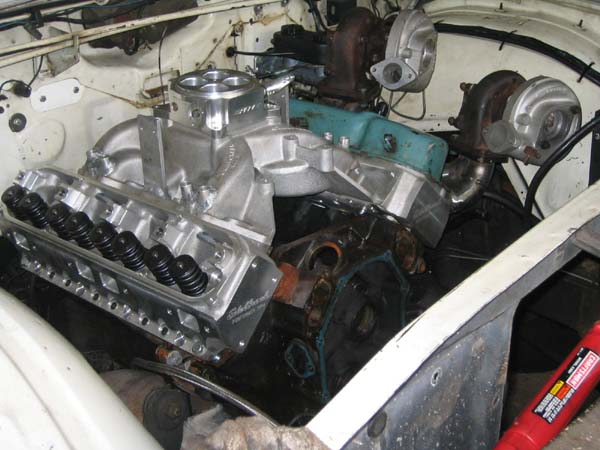
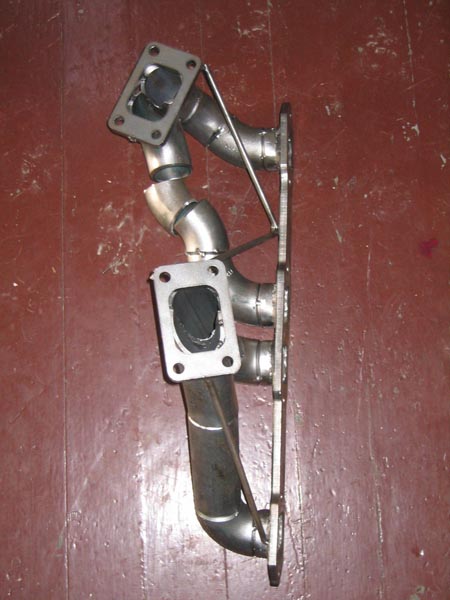
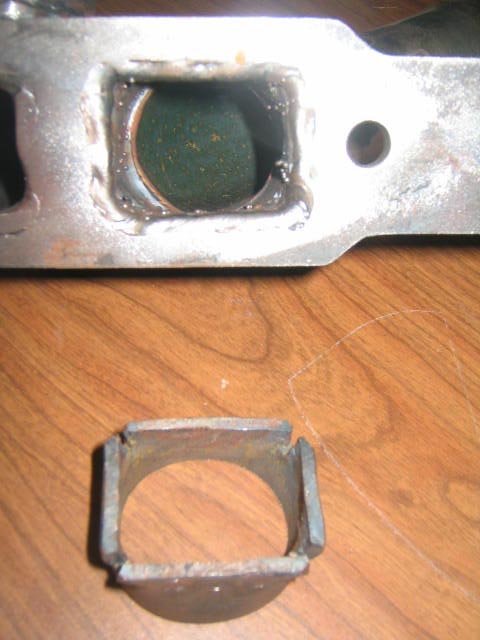
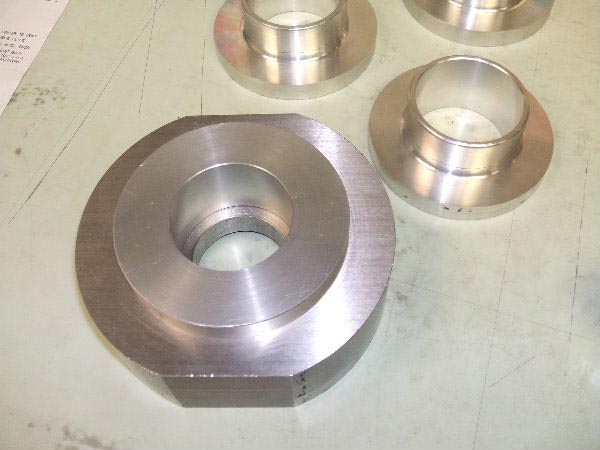
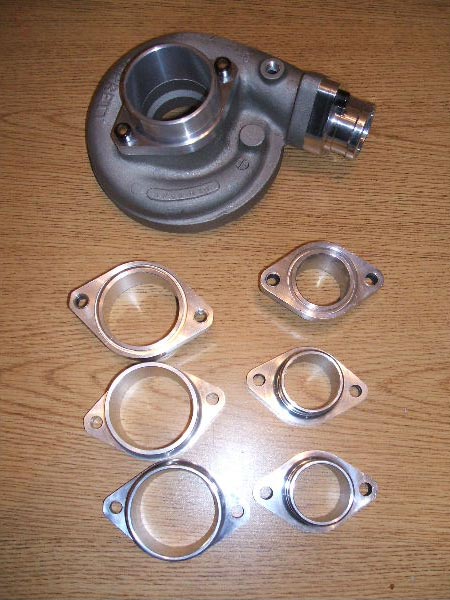
So, here's the turbo grab-bag, which will continue to grow as things are wrapped up. There is some chronological order to it. There are a few things
to notice. #1, The headers are made of Sch. 40 steam pipe. What happens when you go to put a round peg and a square hole? Notice the adapter pieces,
which had each of its corners bent individually by me and Brian at AEC, using Vice-Grips and the oxy-acetelyne torch. The inner dimensions of the port
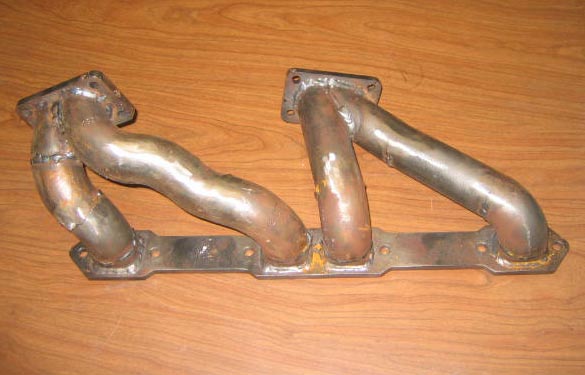
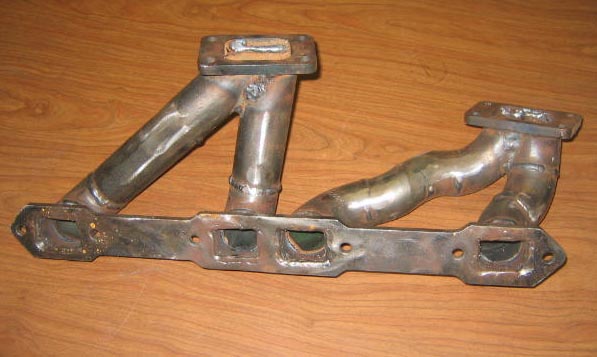
ended up being almost a perfect match to the stock Edelbrock ports. Nice! All of the slag and external welds have been smoothed away. #2. Notice in the
first 3 mockup pictures that the heads are floating mysteriously above the deck - since the original plan was to ultimately use a 440 (and a 400 was in the car), I used some 3/4" key stock and 1/4" dowels to locate the head in
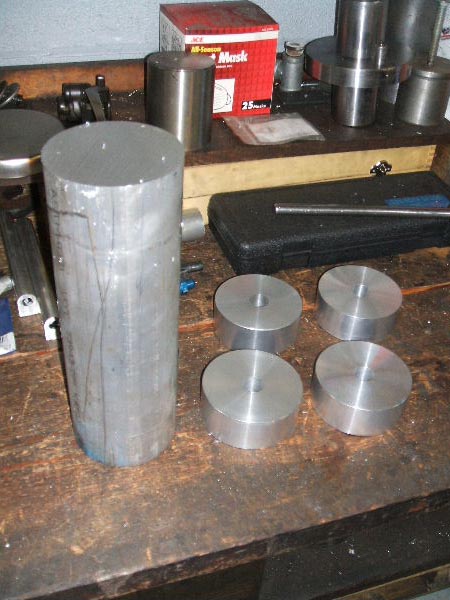
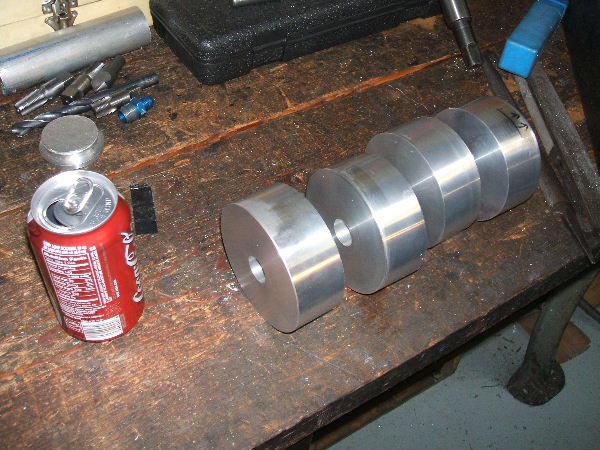
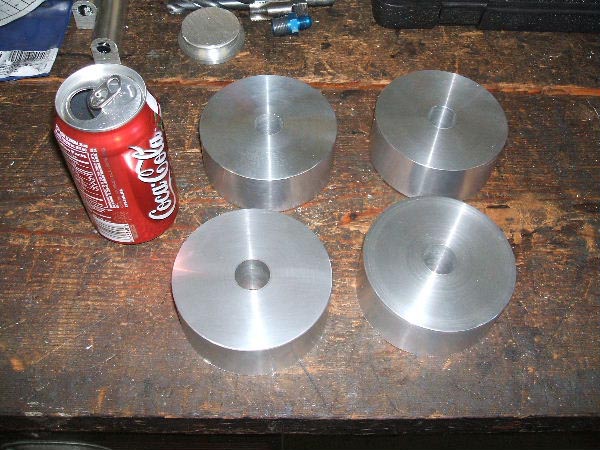
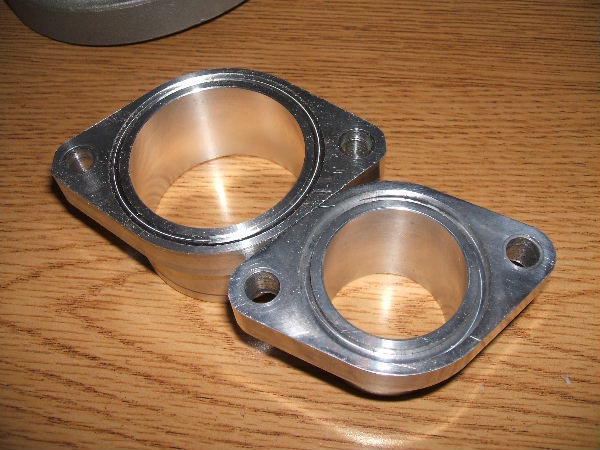
exactly the right spot as a 440. I even used 0.040" head gaskets in case something came "close" to working / not working. What a waste of time. #3. Gander at the CNC'd inlets and outlets, sized to accept commonly
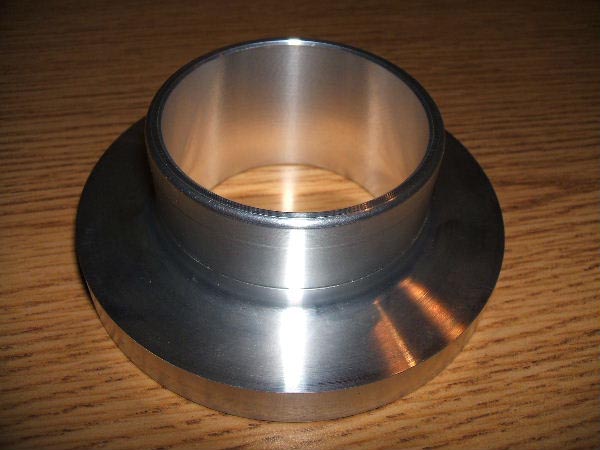
available silicon hose adapters (2.5" inlet, 1.75" outlet), and started as slugs of 4" 6061 bar stock (just that cost $100!). They also feature easy
to find / pay for O-rings, with which to seal to the flange. Imagine trying to buy gaskets for these at Napa: "Sorry, sir, I'm not
showing any turbocharger gaskets for a 1968 Plymouth Fury!" Much thanks to Rob and Brandon at AEC for help!


11/15/05:
It is officially time for a "Fuck RB motors, I'm outta here" party! I managed to unload my block, pistons, and intake without taking a real serious bath. Injectors, throttle body, pushrods, lifters, and cam are gone as well. I'm still left with a pair of Edelbrocks, a turned 440 crank, and CAT rods that nobody wanted to pay for. Awwwww, this is no good.....or is it? As it turns out, the fruits of many brainless hours of data entry into Excel manifested themselves as a few shelf-stock piston options for use in a boosted stroker B-block. And I'm not even talking about sweet pretty-pleasin' over the phone to get (manufacturer X) to tweak an existing design a little bit - I'm talking about pistons collecting dust in a warehouse somewhere. What this means is: I'll never be stuck married to one-off pistons again. You, the loyal No Excuse fan, don't have to either - email me and find out how you can put the stroker database to work on your own combo!
The new combo will feature pistons a full 150g less than the 440 ones. To some, this equates to extra rev-ibility, but to me, it equals less force on everything at a more civilized RPM. Instead of winding it to 7000, which is what everyone seems to think a big Chrysler was built for (hint: NO!!!), I'll cam it to be done making power at 6200; the tradeoff lying in the ability to do wheelies at 60mph in 3rd gear at 2500 RPM. No crazy valvesprings, no huge converter - just big torque. Everywhere. All the time. How will my Goodyear 275/60s like the idea? Well, let's just say they'll be the last to find out!
The pistons I found have a 36 cc dish. Wow! This is actually good, because quite frankly, the stock quench pad area on even the 84cc Edelbrock heads is pretty crappy. With some compression milling and 74cc chambers, I'll have a nice big quench area to work with, along with the extra low-speed "crispness" of 0.6 more points of compression (vs. an 84cc chamber). Just dropping the Eddies on now would yield 8.15:1, which isn't terrible, but not quite what I had in mind. Anyway, the heads are easily swapped with Cometics, and surfacing them doesn't require a teardown, so it can always be done later. Also, Aaron used math and facts to prove that stock Edelbrocks are quite hard to beat in a turbo application (barring bitchin' million dollar CNC heads). And, I already have the valve job and corrected guide honing done to them....birds in hand.
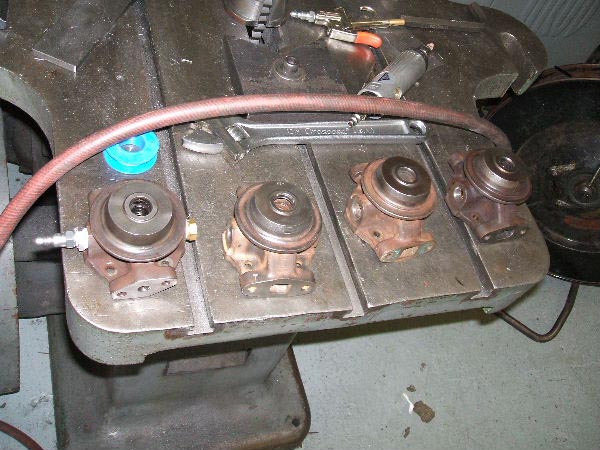
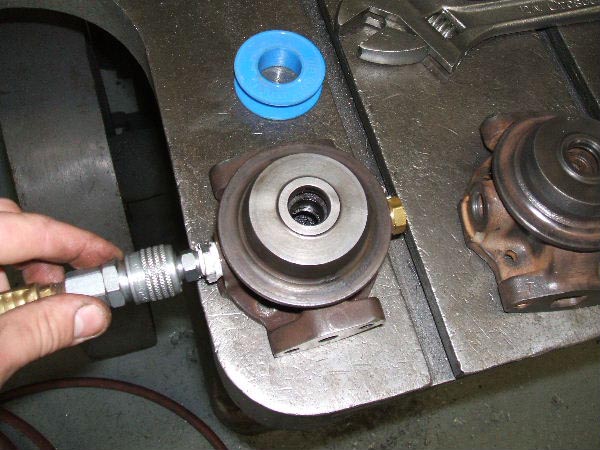
In R&D land, I found that pulling apart and rebuilding T3s is pretty easy, which will cut costs dramatically in the turbo acquisition department. A few $30 rebuild kits plus CHRA balancing is all they need.
So.......some block machining, rebalancing, new pistons, a new manifold, 42# injectors, some fuel line, a custom valley plate and timing cover later, and I'll be on the road. Or not?
What to expect:
454" B-block featuring:
Yeah, I said 454" 400" B-block (of 1978 vintage), align honed, decked, magic-fairy-dust-sprinkled main webbing
Plain forged 440 crank, 2.375" rod journals, 400" mains, turned counterweights
Diamond or JE -36 cc dish, 569g - thanks, stroker database!
CAT 6.76 Rods, 0.990" pins, 790g, ARP2000 bolts
Fresh Shaun Tiede solid roller
Cloyes 3-bolt true roller timing set
Plain Comp/Crane solid roller lifters (I wanted solid dogbones, but apparently they don't exist) Sealed Power H.V. Oil Pump
M.P. water pump, housing
M.P. bronze-geared oil pump drive, bushing Boring Speed-Pro "hoity toity" ugly race version main/rod/cam bearings
ARP main studs
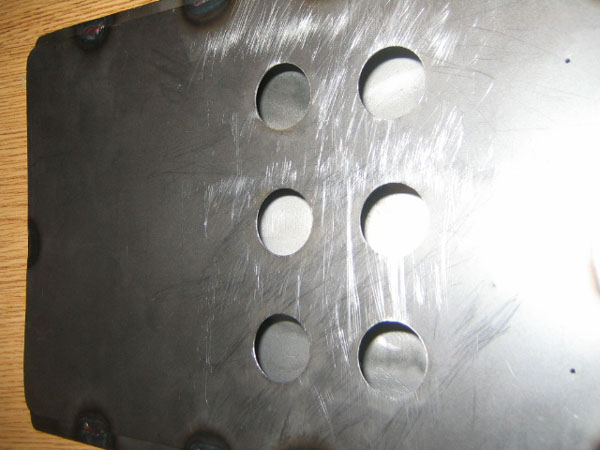
Shaunthony's CNC 6061 valley plate Edelbrocks, milled for a better quench pad, back-cut valves, 5 angle valve job Cometic 0.040" gaskets Chevy Caprice "flattie" AC compressor (because real racecars have AC)
Exhaust/Induction - most likely featuring:
A pair of these motherbitches A boyband's sum of .60/.63 Garrett T3s, wastegates, 2.5" downpipes One of these attached to some runners and bathed in a nice cool eddy of ethelyne glycol 16 staged 42# injectors when the BS3 arrives 4 very small throttle bodies, progressively linked
Fuel system - (Junk as outlined here)
Brains - most likely featuring:
Megasquirt 'n' TFI 'n' HEI is on the shelf too 'n' EDIS would be ideal All goes 'n' the garbage when the BS3 PCM shows up (okay, not really)
Trans - most likely featuring:
Plain 'ol 727, PI converter (later) 4L80E, PI converter, custom bellhousing (obviously)
Rear - most likely featuring:
8.75" 3.23:1 Sure-Grip (later) Strange S60 Dana, S/S axles, Detroit Locker
Chassis - most likely featuring:
H.D. Espo Leaf springs Cop rims, factory blue metallic, widened in back 235-70 R15 fronts, 275-60 R15 BFG D/Rs (or bigger?) Cal-tracs 1972 Chrysler front discs MP Master Cylinder, AREngineering adapter plate Manual brake pedal Manual steering box T.B.D. Doomsday radiator, Mark VII Electrical fan, Bosch 75 amp relay GM A.C. fixins Subframes tied
Body - Paint? HA! Surely you jest.
Interior:
Just have to keep the dream alive for the next year.......then the asskickings begin....